
Reference Images, Backgrounds and Face Uploads: Control the Output
Under the plus icon you can feed the tool a reference image to recreate a real object, a background, your face (two shots from different angles) or a sketch. A prompt tells the tool the idea; these inputs show it the specifics that words struggle with.
Quick answer: Under the plus icon you can feed the tool a reference image to recreate a real object, a background, your face (two shots from different angles) or a sketch. A prompt tells the tool the idea; these inputs show it the specifics that words struggle with.
A written prompt can describe a thumbnail, but some things are easier to show than to say. The exact sword you built in the video. Your studio set. Your face from the right angle. The 1of10 Thumbnail Generator lets you hand the tool actual images to work from, not just words, and this is where you go from steering the output to controlling it. This guide covers the upload inputs hiding under the plus icon: reference images, backgrounds, and face uploads, what each one does, when to use it, and how to combine them with a prompt for the tightest control the tool offers.
For the full tool, start with The Complete Guide to the 1of10 Thumbnail Generator. This post is about the inputs that let you show the tool what you mean.
The plus icon: your upload menu
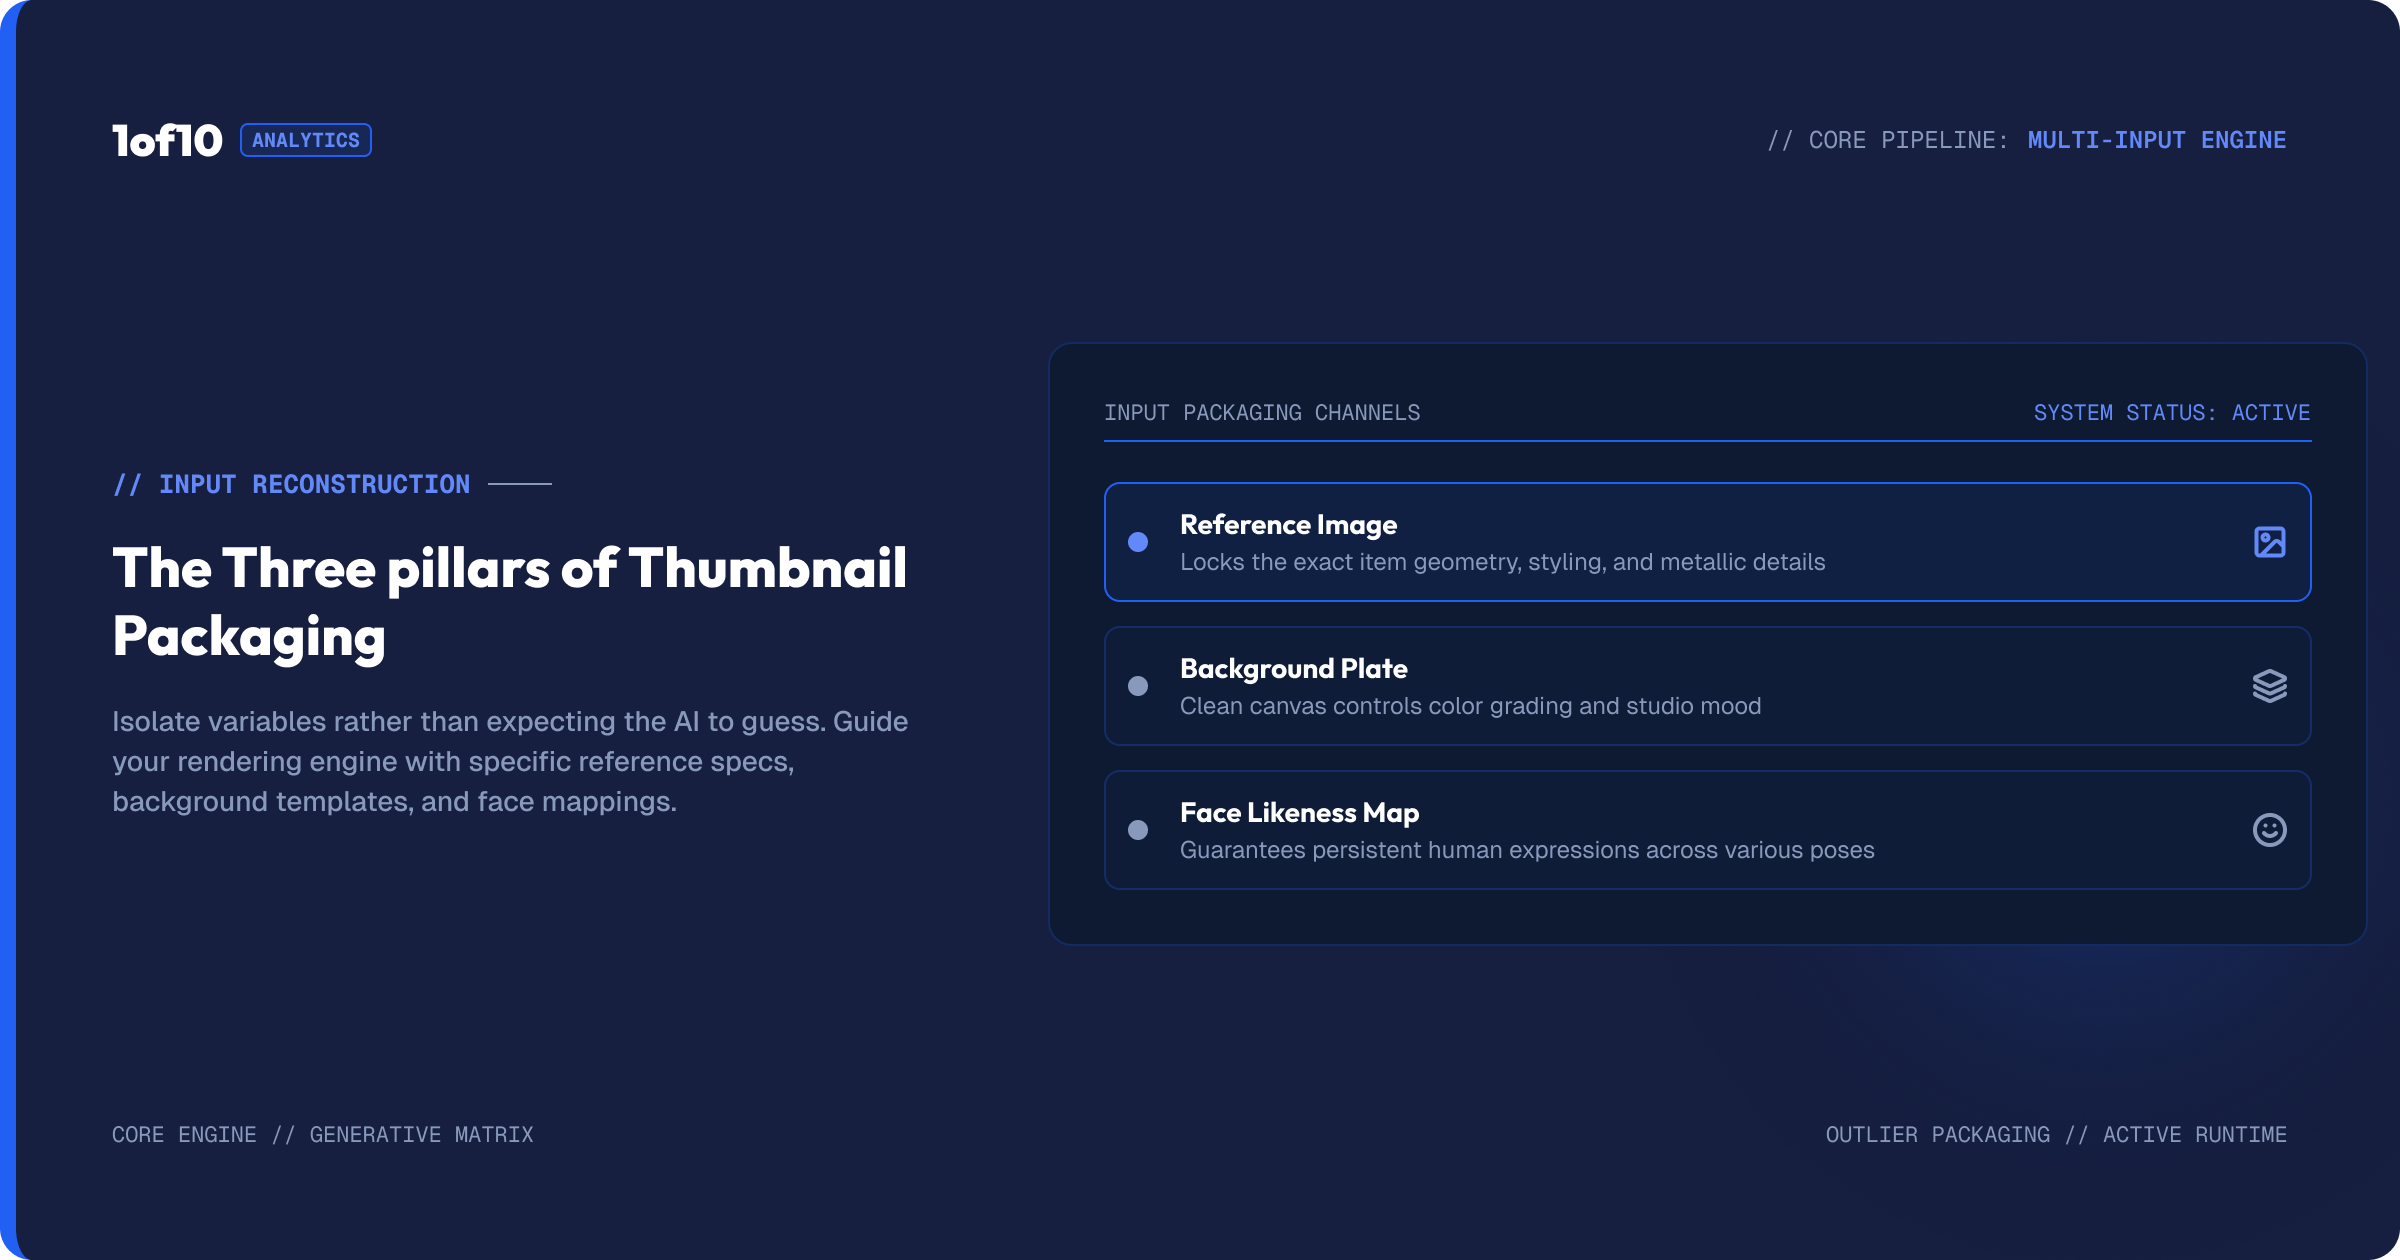
Under the prompt box sits a plus icon. Click it and you get a short menu of image inputs you can feed the tool alongside your text prompt:
- Reference image for style or composition inspiration, or to recreate a specific object.
- Background to set the scene or environment.
- Your face to lock your likeness.
- Upload sketch to hand the tool a rough layout, covered in depth in Sketch to Thumbnail.
Each input plays a different role, and the tool weighs them together with your written prompt. Words tell the tool the idea; images tell it the specifics that words struggle with. Used well, they close the gap between what you imagined and what the tool renders.
Reference image: show the tool exactly what you mean
A reference image guides the tool on style or composition, or recreates a specific object from your video.
Recreating an object. This is the standout use. Say your video is building an ice katana, and you actually built one on camera. Instead of describing the sword in words and hoping the tool guesses the shape, upload a photo of the real sword as a reference. The tool then renders that specific blade in the thumbnail, so the image matches the video. Viewers who click see the thing they were promised. This matters for builds, custom props, products, and anything where the real object has a distinct look.
Borrowing a composition. A reference image can also be a thumbnail whose layout you admire, not to copy it, but to point the tool at a composition style: a tight face on one side, a subject on the other, a particular energy. The tool reads the structure and applies it to your content.
Setting a style. Upload an image with the lighting, color, or mood you want, and the tool leans that way. Useful when your channel has a signature look you want every thumbnail to share.
Reference images are the most flexible input because they can carry an object, a layout, or a vibe depending on what you upload and how your prompt frames it.
Background: set the scene
The background input does one focused job: it gives the tool the environment to place your subject in.
Upload your filming studio so the thumbnail matches your actual set. Upload a location from a trip so the thumbnail uses that real place. Upload any scene you want behind the subject, and the tool builds the thumbnail into it. This is faster and more reliable than describing a complex background in words, especially when the background is specific to you, like your recognizable set that regular viewers associate with your channel.
A consistent background across thumbnails is also a branding tool. If your set shows up in thumbnail after thumbnail, it becomes part of your channel's visual identity, the same way a consistent color or font does. For more on that side, see Thumbnail Background: The Secret to More Clicks.
Your face: lock your likeness
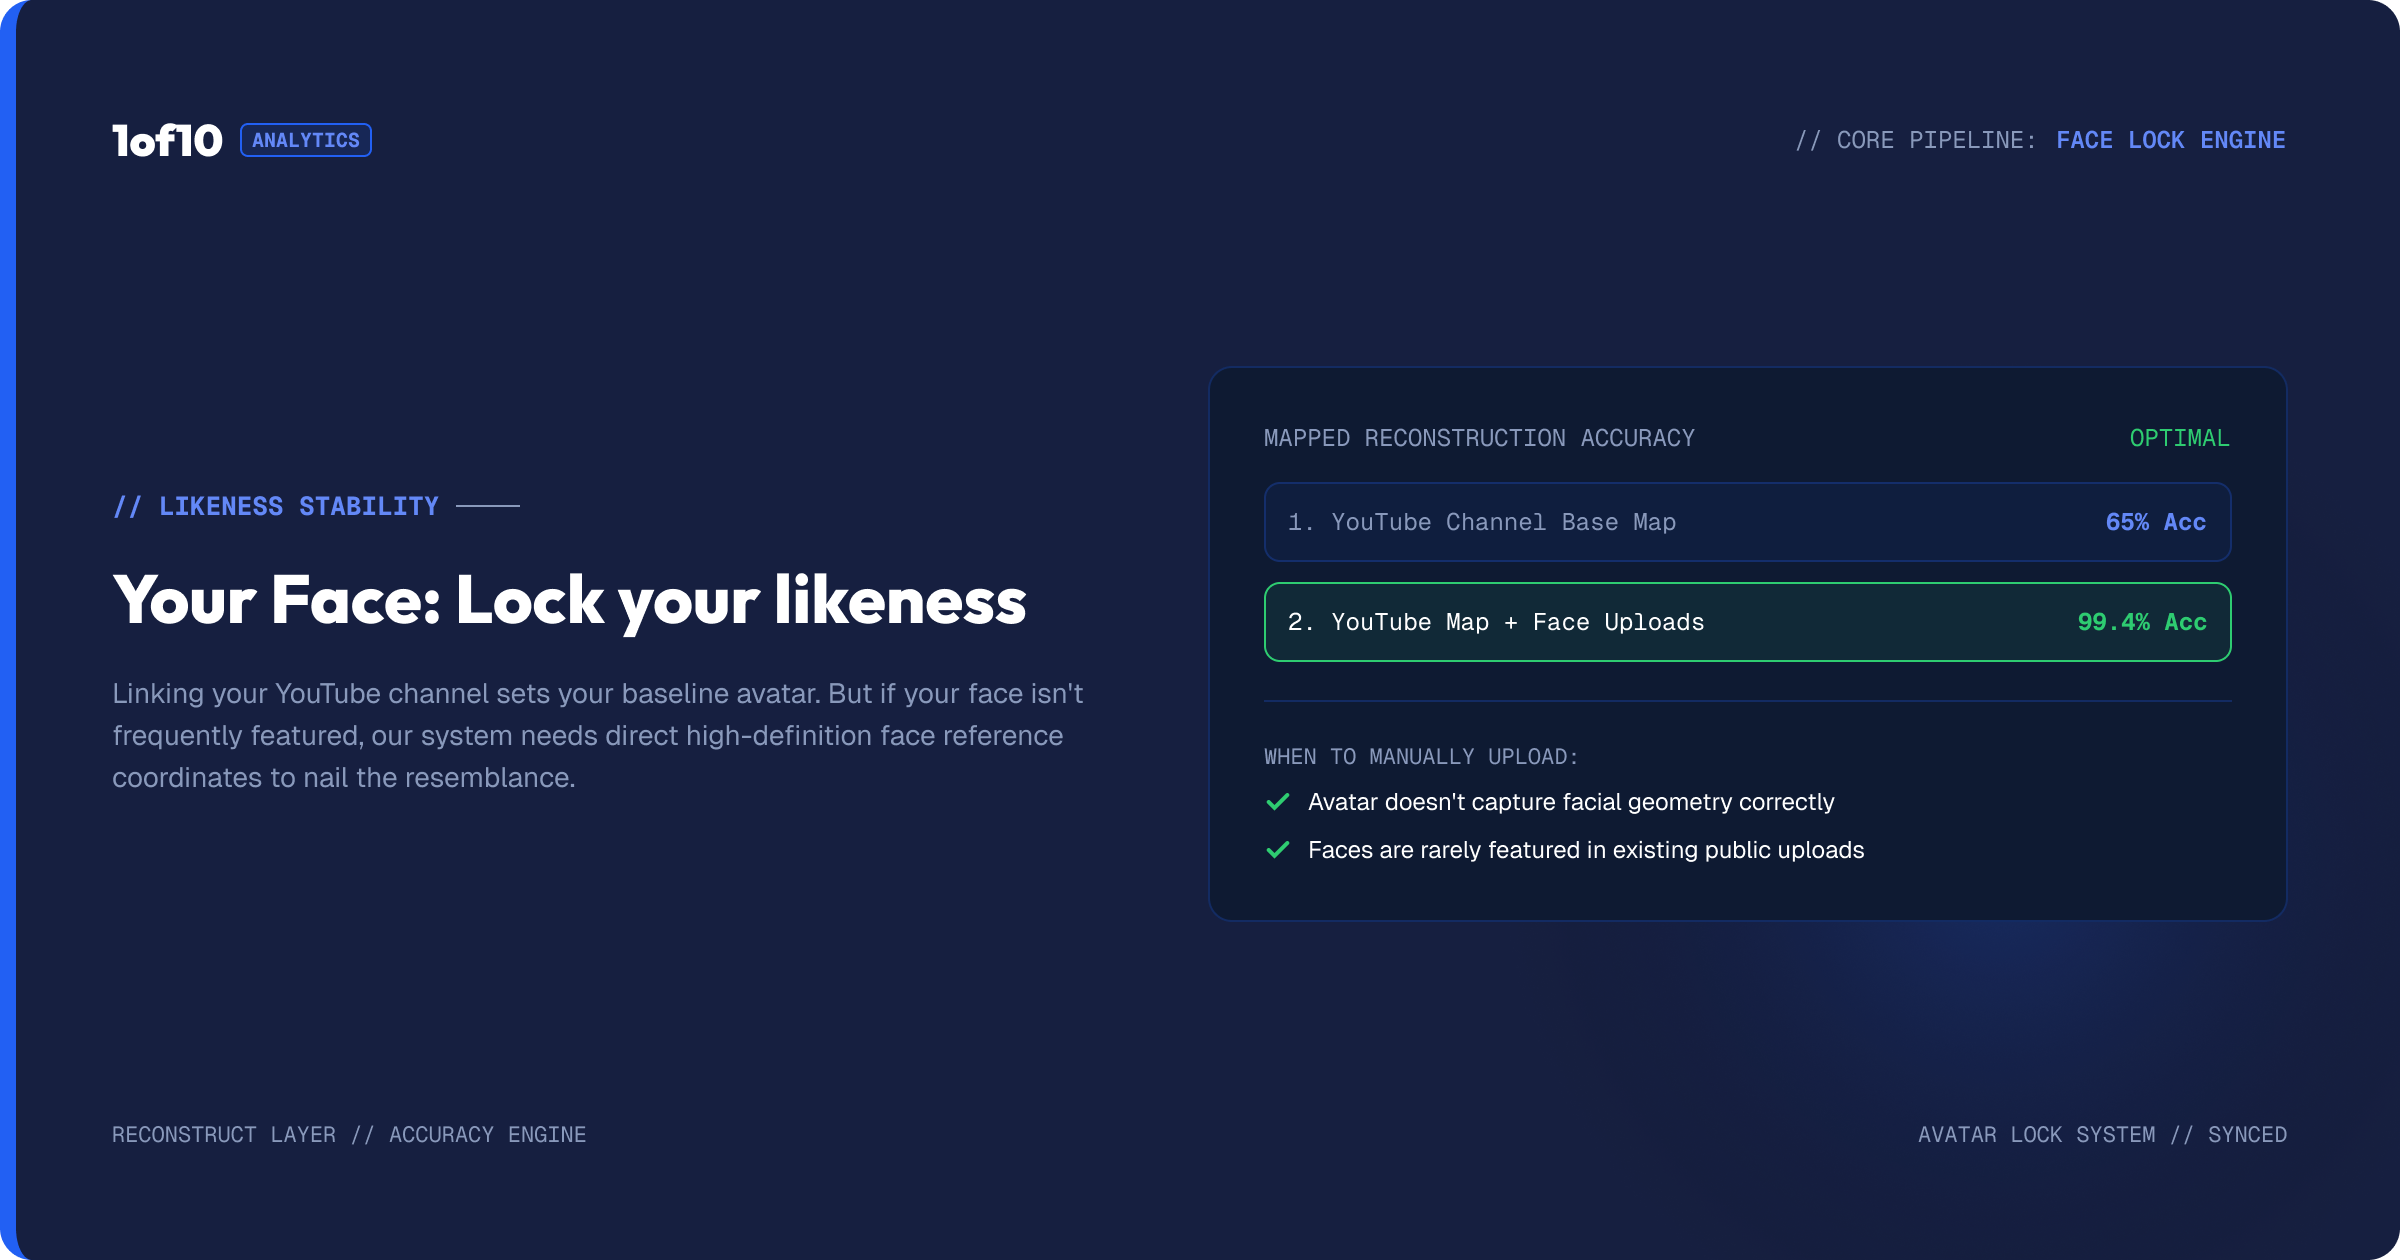
Linking your channel already teaches the tool your face, and most of the time that is enough. The face upload is for when you want extra accuracy.
When to use it. Upload your face when the linked channel is not quite nailing your likeness, when your face does not appear often in your existing thumbnails, or when you are prompting for an unusual angle the tool has not seen from your channel.
The two-angle rule. Upload two clear face shots from slightly different angles rather than one. Two angles let the tool understand the structure of your face, the sides as well as the front, so it can render you convincingly even when the thumbnail shows you turned or in profile. One front-on photo leaves the tool guessing about everything it cannot see.
Match the shot. If the thumbnail shows you side on, include a side-on reference. The tool can only render an angle it has been shown, so giving it the angle you need is the difference between a clean likeness and a near-miss.
The face upload pairs with the editor's Face Swap tool, which fixes or adds a face after generation, and with Link Your YouTube Channel, which handles likeness at the source. If your whole thumbnail style is built on your face, How to Create a YouTube Thumbnail With Your Face goes deeper.
Reference image vs face swap: which to reach for
These two get confused because both deal with getting things right that words cannot. The difference is timing and target.
A reference image is an input you add before generating. It guides what the tool creates: the object, the composition, the style, or in some cases the look of a person in the scene. You use it when you want the generation itself to come out closer to a specific thing.
Face Swap is an editor tool you use after generating. It detects a face already in a finished thumbnail and replaces it with your likeness from uploaded shots. You use it when the composition is already right but the face needs fixing or adding.
The rule: if you want the tool to build the thumbnail around a specific object or look, use a reference image up front. If the thumbnail is done and only the face is off, use Face Swap at the end. Many thumbnails use neither, some use both, and knowing which tool solves which problem keeps you from fighting the wrong one.
Input priority: what to upload first
You do not need every input on every thumbnail, so it helps to know which earns its place first. In rough order of impact:
Face, when likeness is the risk. If the thumbnail is built on you and the likeness keeps missing, two face shots fix the thing viewers notice most. A wrong face is the most damaging miss a thumbnail can have.
Reference image, when a specific object matters. If the video is about a real thing you built or own, a reference photo makes the thumbnail honest to the video. Mismatched objects make a thumbnail feel like a bait and switch.
Background, when the setting is specific or on-brand. If the scene needs to be your recognizable set or a real location, upload it. If the background is generic, a prompt line handles it.
Start with the input that fixes your biggest risk, generate, and add more only if the result still needs them. Stacking all four on a simple thumbnail is wasted setup.
Combining inputs for maximum control
The inputs are not either-or, and the real power shows when you stack them with a prompt. A worked example for an ice katana build video:
- Prompt: the four-line detailed structure describing the creator slamming the blade through a target.
- Reference image: a photo of the actual ice katana you built, so the blade is correct.
- Background: your filming field or studio, so the setting matches.
- Face: two shots if the likeness needs sharpening.
Now the tool has the idea (prompt), the object (reference), the setting (background), and the likeness (face) all locked. The output has very little left to guess, which means fewer corrective generations and a result that matches your vision closely. This is the tightest control the generator offers, and it is worth setting up for your most important videos.
You do not need every input every time. A quick thumbnail might use none. A flagship video might use all four. Match the effort to the stakes.
A walkthrough: building a product thumbnail with inputs
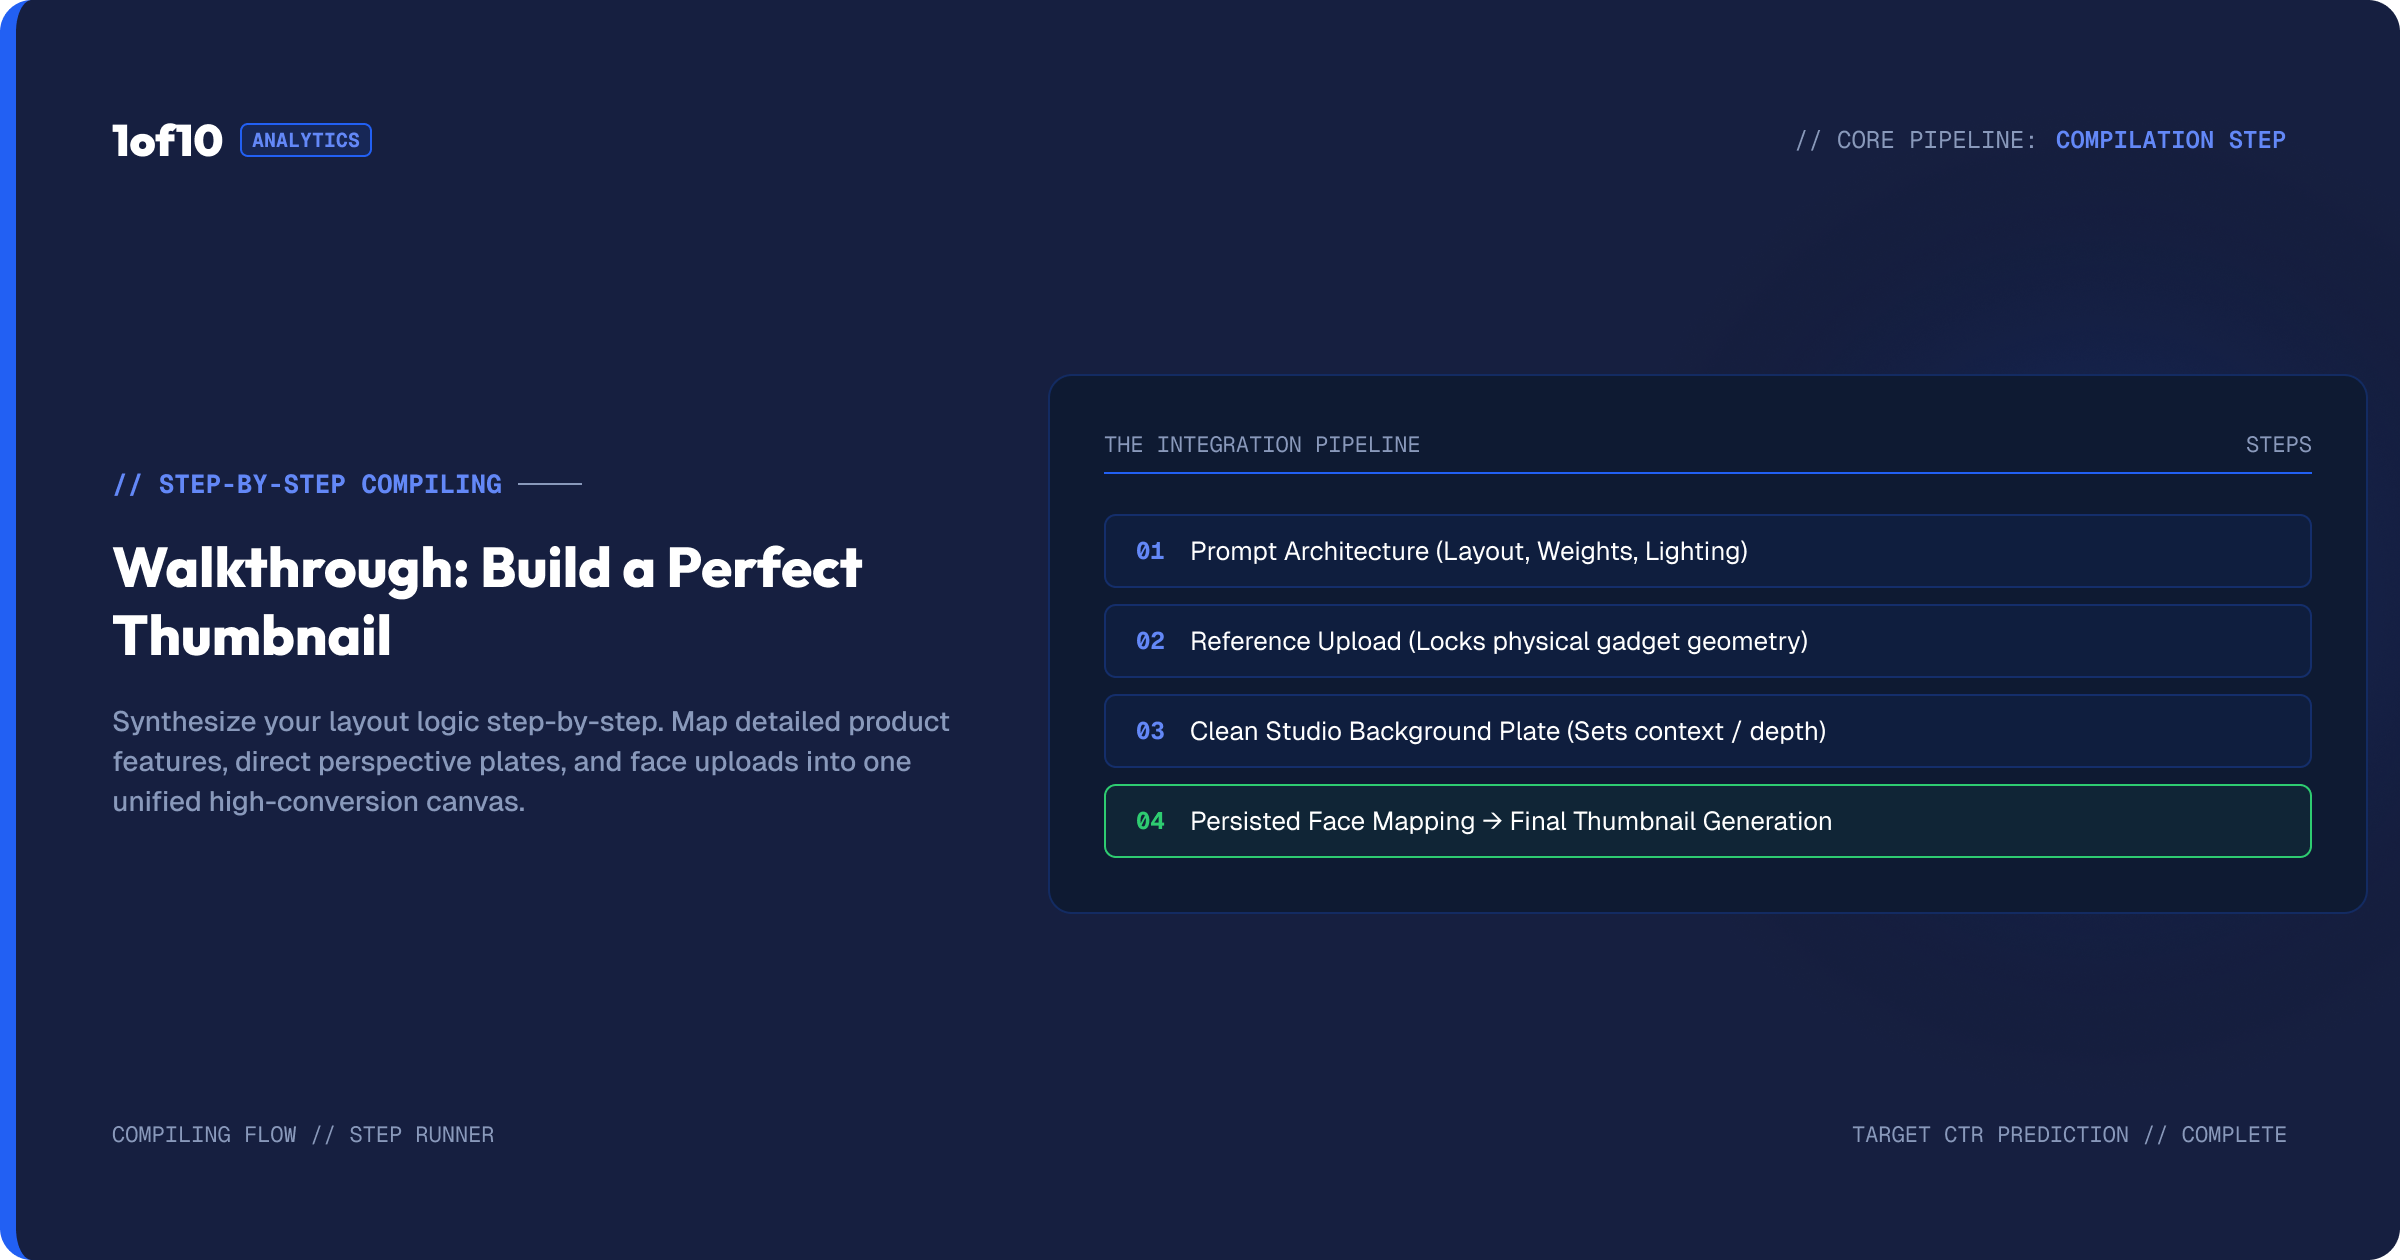
Say you run a tech channel and the video reviews a specific gadget. Here is how the inputs stack to get a thumbnail that is honest to the product and unmistakably yours.
Start with the prompt: the four-line detailed structure describing you holding the gadget, a shocked expression, the product hero in frame, a clean background, and a price or rating as text. Generate once on the quick title first if you want directions, then move to the detailed prompt.
Now add the inputs. Upload a clear product photo as a reference image so the gadget in the thumbnail is the actual device, with its real shape, color, and details, not a generic stand-in. Viewers who clicked because they recognized the product see exactly what they expected. If your likeness is drifting, add two face shots so your reaction reads as you. If your channel has a recognizable desk or set, add it as a background so the thumbnail matches your other videos.
Generate, and the tool now has the idea, the real product, your face, and your setting all locked. The result needs far less correction because almost nothing was left to chance. Take the strongest of the four to the editor for final text and polish with Text and Fonts and Adjust and Crop. That is the full input stack working together on a real thumbnail, and it is worth the two minutes of setup on a video you care about.
How inputs work with the prompt and the iteration loop
Inputs do not replace good prompting, they sharpen it. Your written prompt still drives the composition and the action; the inputs pin down the specifics the words cannot. And inputs carry through the iteration loop from The Detailed-Prompt Method: when you add a correction line and regenerate, your uploaded reference, background, and face stay attached, so each pass refines the composition while holding the object, setting, and likeness steady. That is exactly what you want. You are correcting the shot, not re-establishing the basics every time.
When you need no inputs at all
It is worth saying plainly: most thumbnails do not need any uploads. A linked channel already handles your face and style, and a detailed prompt handles the composition. The inputs are for the cases where words and the channel link fall short: a specific real object, an exact setting, a tricky angle, or a likeness that keeps missing. Reaching for an upload on every thumbnail adds setup time you do not need.
The skill is knowing when the extra control is worth it. A quick daily upload probably needs nothing beyond a good prompt. A flagship video, a product review, or a build where the real object is the hook is worth the two minutes to stack inputs. Match the effort to what the thumbnail is worth, and use inputs as the precision tools they are rather than a default step. When you do need them, they are the difference between close and exact.
Common mistakes
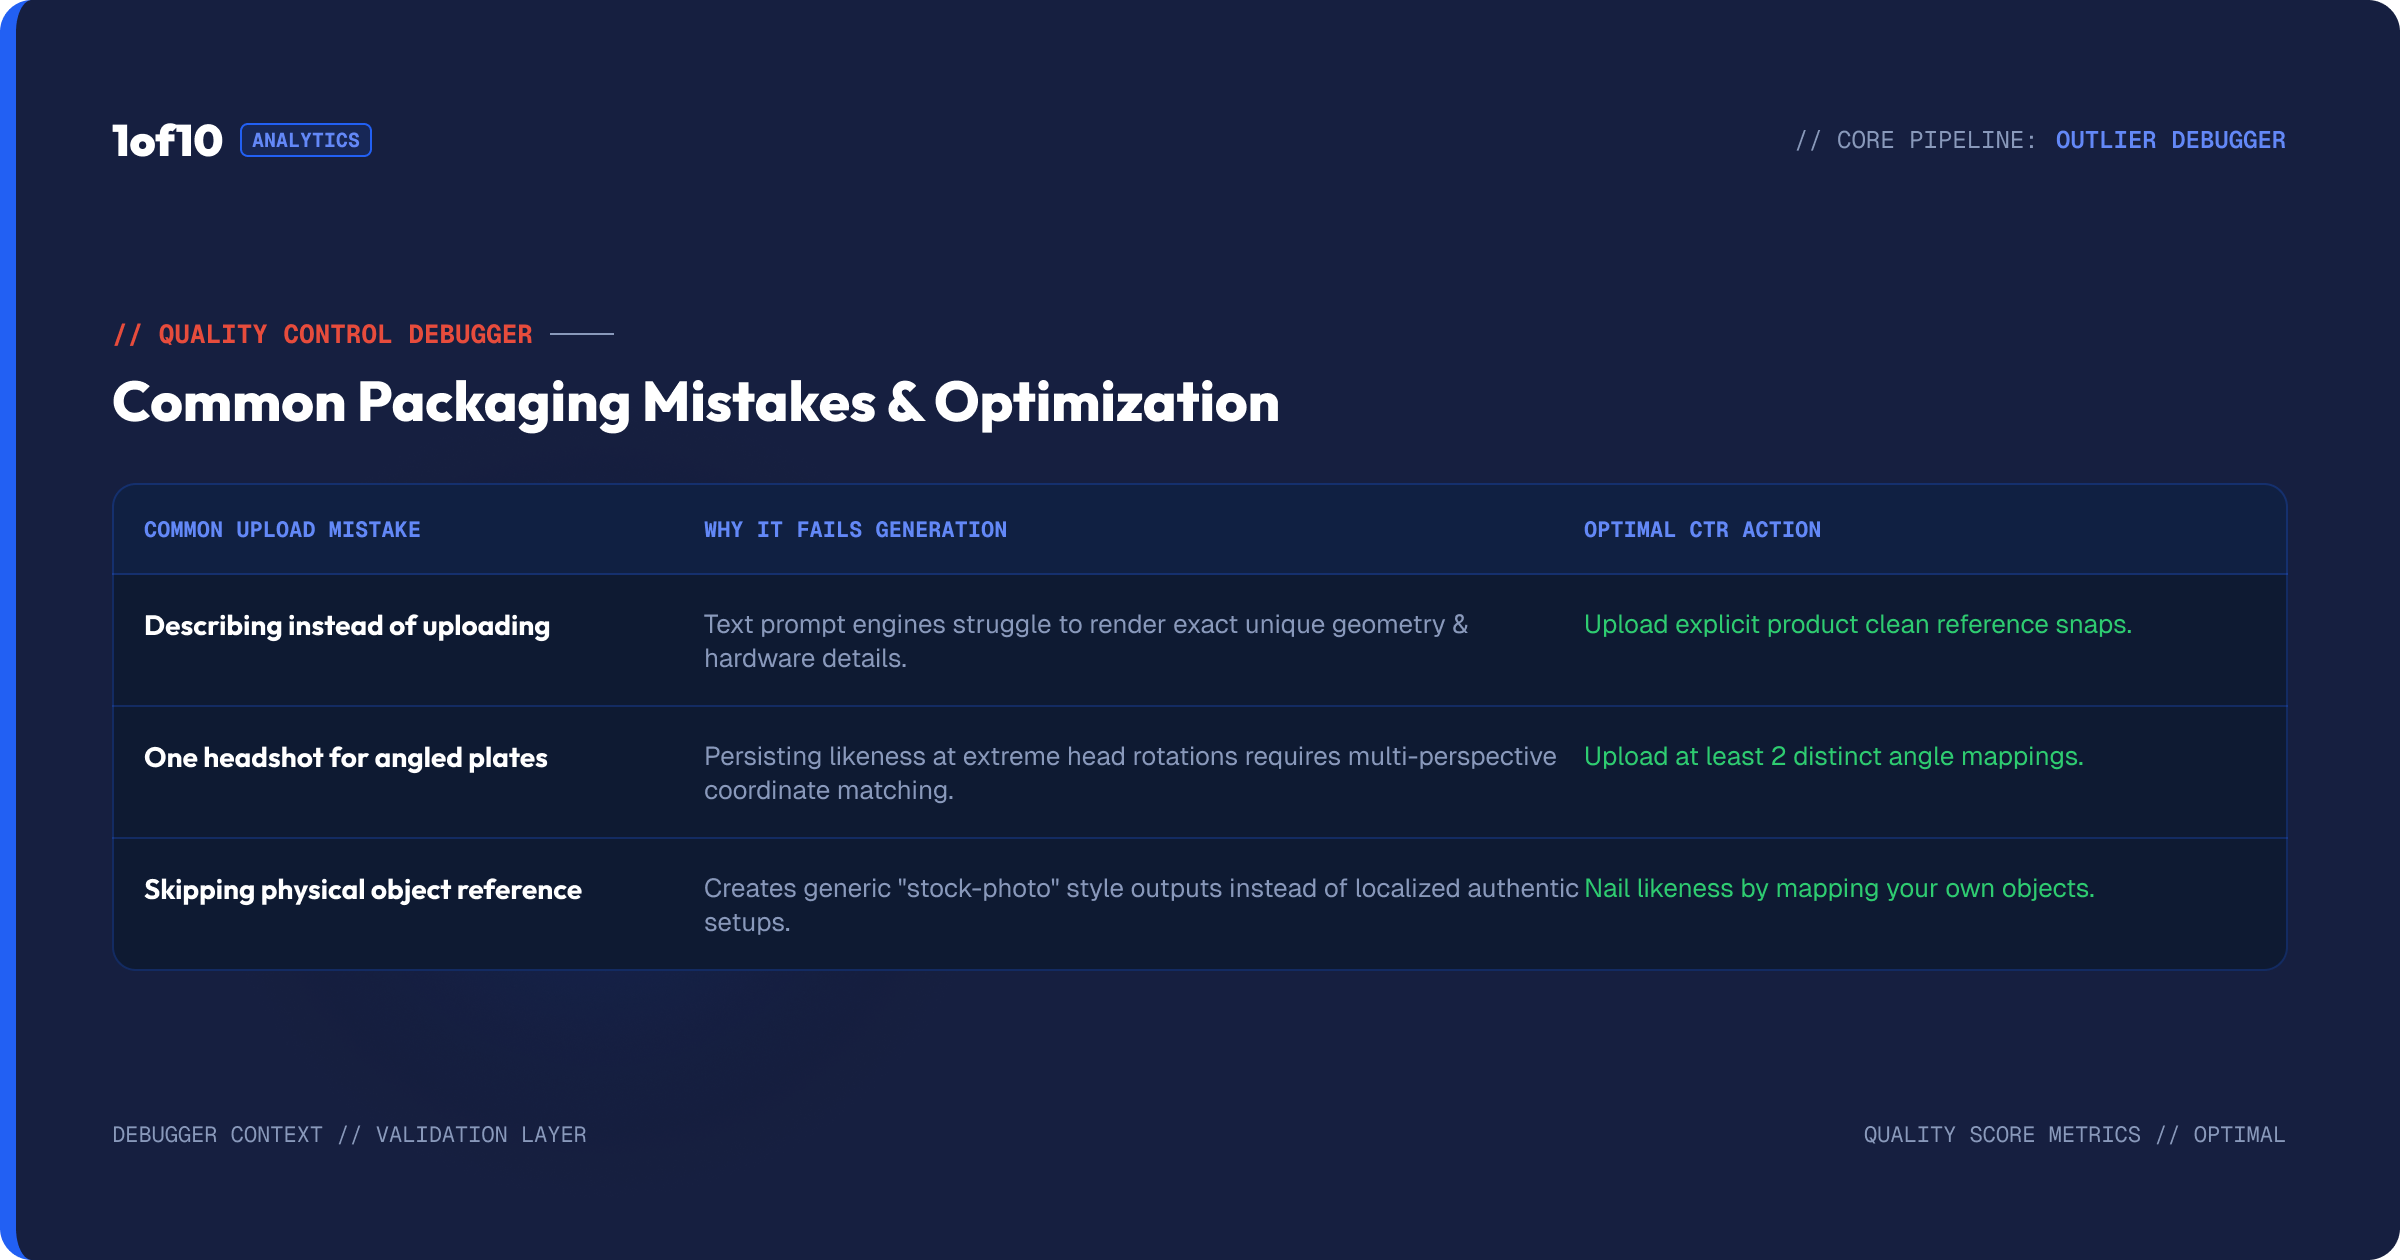
Describing an object you could just upload. If you built or own the thing in the thumbnail, a reference photo beats paragraphs of description. Show, do not tell.
Uploading one face shot for an angled thumbnail. One front-on photo cannot teach the tool your profile. Use two angles, and match the angle to the shot.
Treating inputs as a fix for a weak prompt. Inputs sharpen a good prompt. They do not rescue a vague one. Write the detailed prompt first, then add inputs to lock specifics.
Ignoring background as a branding tool. A consistent set across thumbnails builds visual identity. Reusing your real background is a cheap, repeatable win.
Overloading every thumbnail with every input. Inputs take setup. Use them where the stakes justify it, not on every throwaway video.
Frequently asked questions
How do I use a reference image in an AI thumbnail? Click the plus icon under the prompt box and add a reference image. Use it to recreate a specific object from your video, to borrow a composition style, or to set the lighting and mood. The tool combines the reference with your written prompt.
Can I add my own background to a thumbnail? Yes. Upload a background image under the plus icon, such as your studio set or a location from your video, and the tool builds the thumbnail into that environment. It is faster and more reliable than describing a complex background in words.
How many face photos should I upload? Two, from slightly different angles. Two angles let the tool understand the structure of your face so it renders you accurately even at turned or profile angles. Match the reference angle to the angle in the thumbnail.
Do I need to upload my face if my channel is linked? Usually not. Linking your channel teaches the tool your face from your existing thumbnails. Upload face shots only when the likeness is slightly off, when your face is rare on your channel, or when you need an unusual angle.
Can I use a reference image and a prompt together? Yes, and you should. The prompt drives the composition and action; the reference, background, and face pin down the specifics words struggle with. Combining them gives you the tightest control the tool offers.
What is the difference between a reference image and Face Swap? A reference image is added before generating and guides what the tool creates, including objects, composition, and style. Face Swap is an editor tool used after generating to fix or add a face in a finished thumbnail. Use a reference up front, Face Swap at the end.
Which input should I add first? Start with the one that fixes your biggest risk. If likeness is the worry, add two face shots. If a specific real object matters, add a reference image. If the setting must be your set or a real place, add a background. Add more only if the result still needs them.
The takeaway
A prompt tells the tool the idea. The inputs show it the specifics. Use a reference image to recreate a real object or borrow a composition, a background to set your scene, and two face shots to lock your likeness at the right angle. Stack them with a detailed prompt on your important videos and the tool has almost nothing left to guess, which means a closer result in fewer passes. Words and images together are how you go from steering the output to controlling it. The full workflow is in The Complete Guide to the 1of10 Thumbnail Generator.